Showing posts with label millinery. Show all posts

Wednesday, January 8, 2014

A Year in Hats

I started making hats at the end of December. Then in January, this happened:
I had a crazy thought this morning, before the caffeine hit my bloodstream: Wouldn't it be awesome to make a hat a day? Then I realized how insane that would be; 365 hats?! Even if I gave a bunch away, what it the hell would I do with them all? OK, hat a week, then, my idiot brain says. No -- 52 hats is still unmanageable. Fine, how about one a month? Fine. Fine. OK! (Ahem... everyone has conversations with themselves, right..?)
This post is the chronicle of hats, with new and improved photos (for most of them) and links to the posts and/or tutorials where applicable.

The Prequel (Dec. '12)

Month One (Jan. '13)


Month Two (Feb. '13)


Month Three (Mar. '13)
  • (Not So) Quickie Beret (reversible)
  • March's Hat: Flowers (beret)
  • refinished old berets 
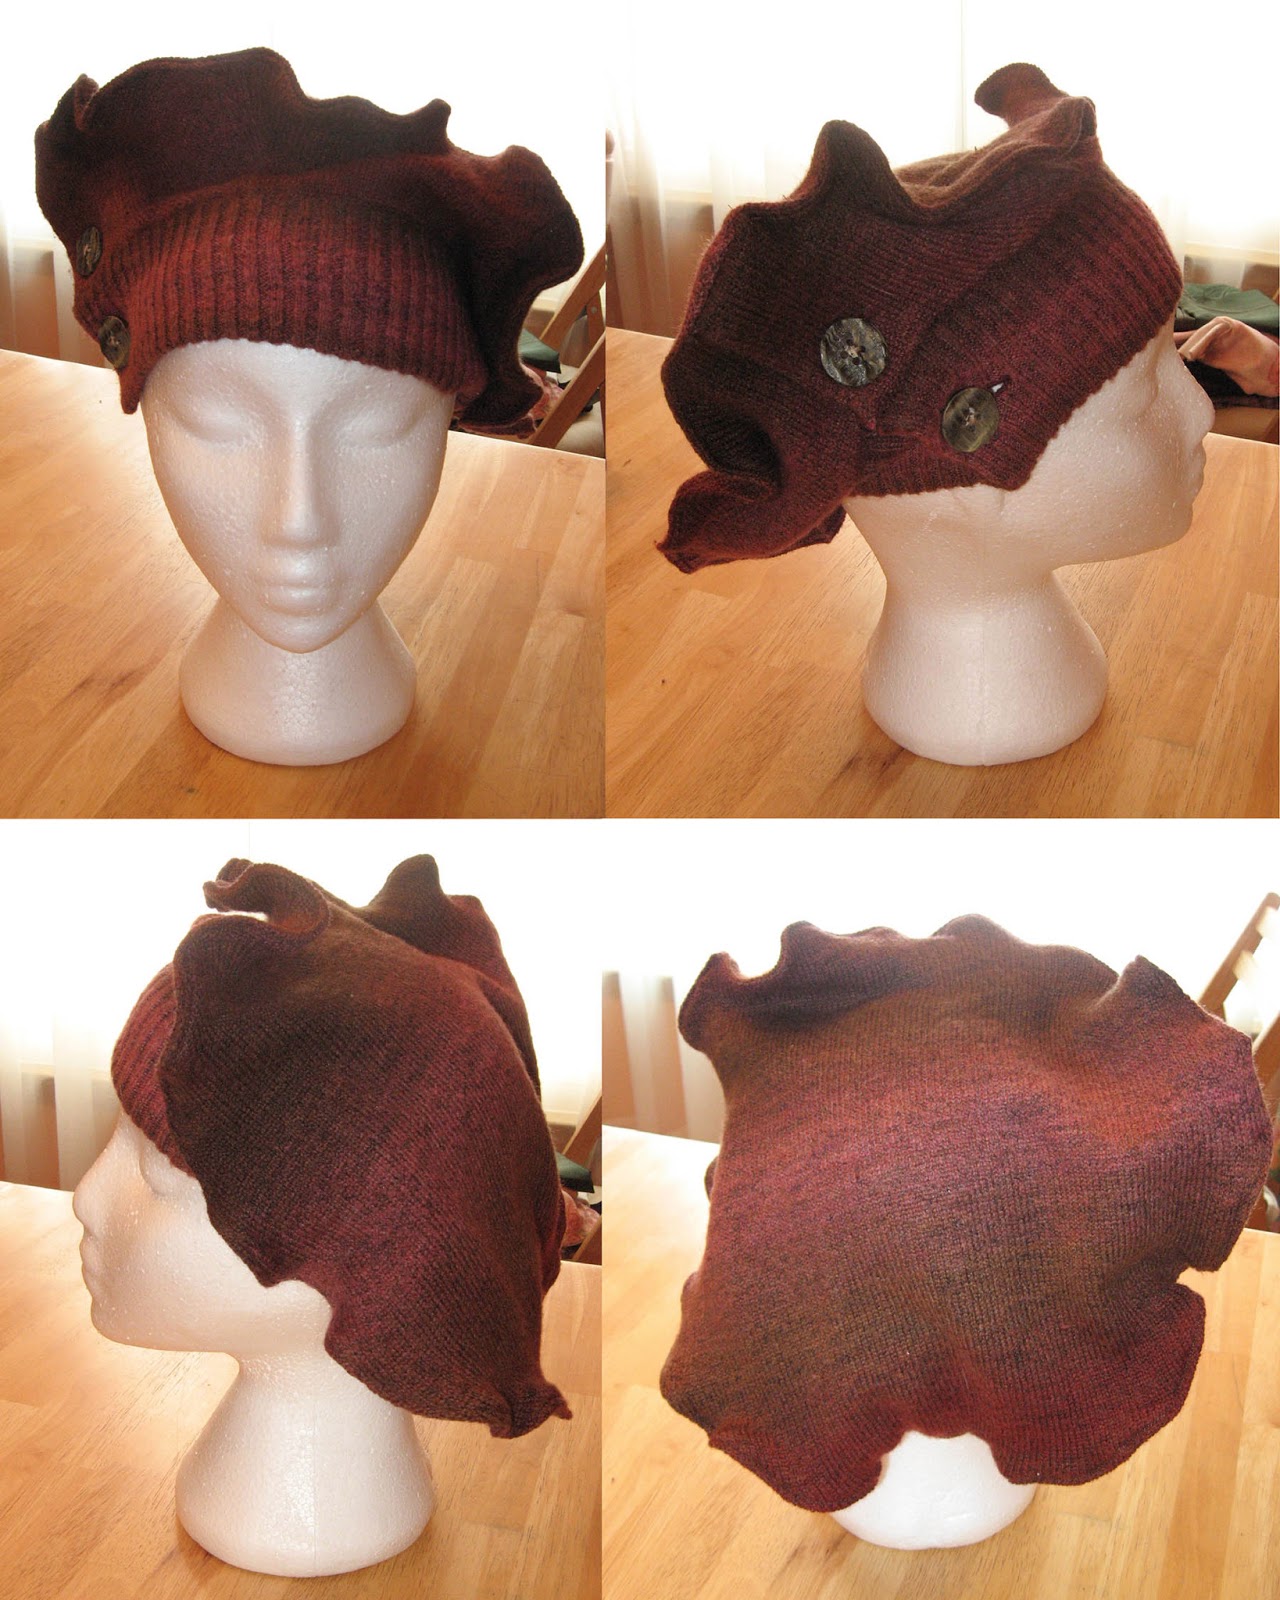
  • Recycled Sweater Beret (painful lesson learned: some hats look like dog toys to a dog)
  • Ombre Sweater Hat (beret, sort of)
  • DC pieced beret 
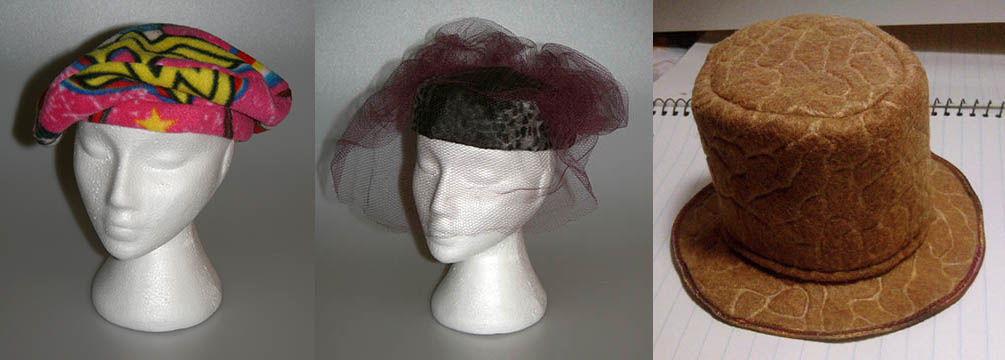
  • Wonder Woman berets (2)
  • oval "fur" pillbox (not satisfied with this one, and will be reworking it)
  • craft felt mini top hat (using a very modified version of this pattern)
  • recycled knit shirt berets (4)
  • felted wool sweater beret (unfinished)
  • dragon hat (pattern from Fleece Fun) -- sadly, I don't seem to have a photo of this, and I gave it away




Month Four (Apr. '13)

[cue crickets chirping]

Month Nine (Sept. '13)


Month Ten (Oct. '13) 

Thirteen months later, the number of hats made ended up being... 34! (I'm not counting the modifications I made to the berets already had. Those were made for me by my mother years ago, and really all I did was add a band to them.) I'm disappointed with myself that I was unable to do a "theme" hat every month, but so many things conspired against me, including my own inability to focus on anything for too long. Still, 34 hats over 13 months is pretty impressive...

Monday, October 7, 2013

October's Hat: Pumpkin Beret

A quickie, made in a few hours. This is the same beret pattern I always use (McCall's 2629, out of print), but the top of the beret is pieced to look like the lobes (ribs?) of a pumpkin. Once I got it all sewn together, I ran a stitch up the bottom of the hat to connect with the pieced top. Yes, there is a seam that runs through the middle of my "pumpkin," but I didn't want to spend the day figuring out how to do it without the seam.

To get the stem, I cut a piece of felt on slight angle and rolled it up. I stitched that together at the bottom, and secured the loose end, then stitched it to the center of my beret. I found a pattern for pumpkin leaves, and used a crocheted corkscrew to look like vine, using a YouTube tutorial. (Yes, it's true: I didn't know how to make one of those things until today.) I was lucky enough to have yarn that matched the felt on hand. In fact, all of this was from my stash.


You can see the vertical stitch here.


Honestly, I don't think this could have been any simpler. And now I have something to wear when I meet Jill Thompson later this month!

Friday, April 5, 2013

April's Hat: More Flowers!

Spring, at last! My flower garden is showing signs of life again, and I am so happy the snow is gone.

To make this hat, I used the Folkwear Metropolitan Hat pattern. Other than the gathered detail of the crown, which kind of eluded me, I found it straightforward and easy to make. I used fleece for the exterior, and for the lining some tie-dyed cotton blend that I had from my stash.

Years ago, when I was trying to make the awful drafty windows in our old house less so, I covered them with panels of fleece as makeshift insulation. For my daughter's room I used cream and stitched bright fleece flowers (from a remnant) randomly all over them. The fleece for my hat came from those "curtains."

Sewn together, with one of the fleece flowers stitched on. Sewing on all those little flowers took forever.
It's a comfy, slouchy hat, cheery and bright and fun. And it's probably too warm to wear it now, but it can also be a great hat to wear in the cold and snow, bringing a little sunshine to a winter's day.


I will almost certainly make this hat again, but I think I will eliminate the gathered crown. Or maybe I just need to play with it some more to figure out exactly what the instructions are telling me to do...

Wednesday, March 6, 2013

Ombre Sweater Hat


When I saw this cardigan, I loved the neck detail and the buttons. I was sure that I could flip that over and make a hat using the neckband as a headband. Didn't know how, exactly, but I was pretty sure I could do it. Plus, for $4, how could I go wrong?

Like with the cashmere hat, I cut open the seams -- but not completely! I needed some of the sweater to complete the bottom of the beret. I cut the sides open to the armpit, and the seams of the raglan sleeves a little. 


I placed the round beret pattern piece over the top of the sweater, to get a general idea of how far out I needed to cut, in this case, about three inches out from the neckband.


I couldn't find any chalk, and my tailor's pencil wasn't marking the knit, so I used a crayon.
I didn't want to pin my pattern piece to the sweater and try to cut it that way, so after I marked a few dots all around the neckline, I traced the circle on a piece of cardboard to use that for a template to mark my cut line.


Looks awful, but it worked fairly well.
I lined up the edges of my template with the dots I'd marked, tugging the sweater in place where I needed to. Pressing down hard on the cardboard, I marked the line. (Note to self: get chalk.) After the work I had to do for this, cutting the top piece was a cinch.

I had initially planned to line the top part of the hat with some extra suit lining, but decided not to after recalling what a pain in the butt the satin was from the cashmere hat. I sewed around the edge with a quarter-inch seam allowance, then did a tight zigzag between that and the edge to prevent raveling.


It ruffled the edge beautifully! I turned the hat right-side out and topstitched through the zigzag (inside), right along the edge of the hat. I wanted to stiffen it a little more.


I went around a second time in the same place, this time pulling the knit taut using both hands to encourage ruffling and reenforcing the hem.


In these photos, I had not yet done the handsewing of the buttoned cuff.

Sewn placket
In the end, I have a very funky and unique beret, that looks a little less like a beret and a little like textile art. I love that the button placket stiffens the side, so I thought I'd try to treat the shoulder seams the same way I did the crown's hem, but without the ruffling. I zigzagged up and down those seams, and what do you know - it worked! I might be able to get them even stiffer, but I don't want to mess with it when I'm happy with how it is now. My other option would be to sew in some boning, and that might be overboard.

Those seams did curl a little, but not very noticeably from the outside.
Proud of it? You bet!


I am going to need to annex that closet soon...

Sunday, March 3, 2013

March's Hat: Flowers

 
We've had quite a bit of snow lately, and while we need the precipitation because of the summer drought, frankly I'm sick of shoveling the stuff. I've been dreaming about my garden, sleeping under its white fluffy blanket. And while I've been dreaming of flowers, the flowers have inspired hats.

I used a tutorial at Fleece Fun for no-sew hair flowers, but on a much larger scale. I used polyester suit lining in three colors: off-white, pale pink and medium pink, and make four circles in each color, each a little smaller than the last, and employed Angel's method for burning the edges to create a curled and ruffled effect.


I made an apple-green satin beret (stiffened a bit with interfacing), and sewed around the outside of the crown to make it more stiff.


All of the off-white layers were machine-stitched together...
...then the light pink layers were machine-stitched to that...
...and three of the darker pink layers were machine-stitched to that,
making eleven layers.


The layers of petals were sewn to the beret.
The final pink petal was sewn on with the glass beads that make the flower's center.


I am so pleased with the way this turned out. It's probably as close to couture as I can manage at this point in my millinery self-education. It's considerably more feminine and delicate than anything I typically wear, so I'm not certain at this point what I'll wear with it, but I do love this hat.

Thursday, February 14, 2013

February's Hat(s): Valentines


This is not a tutorial, mainly because I forgot to take photos of my process. However, I will describe what I did. If you want to try it, hopefully that will give you enough to get you started.

I bought a couple of heart-shaped candy boxes, with the idea of turning one of them into a velvet Conversation Heart pillbox hat. I never did find any pink velvet... Anyway, the Russell Stover boxes I got were not quite the right size. The little 3-piece box (right) was too small, and the larger box (don't remember how many pieces, but it was the next size up -- 7, maybe?) was too large. Bummer.

The larger heart is 5.5" in the longest dimension, the smaller is 4"; both are 1" deep.
The gift box (not pictured) is 4.5" and about 1.5" deep.
In my quest for pink velvet, I found a small heart-shaped gift box at Joann's for 99¢. The size was about midway between the candy boxes, sturdier, and taller. This worked out perfectly! I needed to contour the sides of the box so that it would fit more closely to my head. Basically, I shaved the sides in an arc until it felt comfortable on my head and didn't dig in. I used an X-acto knife for that.

I used pink velour to sew a cover for the box, basically making a fabric version I hoped to slip over it that would fix snugly, but when I tried it, it did not work as I'd hoped. I hot glued pink felt on the sides to cover the printed design, and to give a softer surface for the velour to cover, particularly the bottom edge of the sides that were a little uneven from my surgery of them. My second attempt was to stretch the velour over the box and glue it on the inside. I started from the front (the most visible part) and worked my way around. I did end up with two pleats at the back that I might have been able to dart to make fit better, but I was afraid to cut into the fabric at that point because I didn't have any to spare.

Contoured back and sewn up pleats.

Contoured front.

After I got the velour glued in place, I lined the inside of the box with more felt to cover the folded-over sides, and crown. I did sew the edge of the felt down; that helped me snug the velour down a little more. Once the edge was sewn, I did glue the sides. I also sewed the pleats at the back, to try and flatten them more.


I used a glossy fabric paint writer (Scribbles®) to spell out "BE MINE" on the top, after marking the letters with a tailor's pencil. Unfortunately, I still haven't gotten all the marks off from that. The lettering isn't perfect, but considering my handwriting, it's pretty fabulous.


How I'm getting it to stay on my head is a little strange, but I'll try to describe it. I bought this nifty double hair comb thingie at Target. Because of the shape of the heart, it's too wide without fussing with it a bit. I have to push the front edges closer together to allow them to be completely covered by the hat.


I wound my hair into a pretty tight bun, secured with hair sticks, then put the combs in where I wanted the hat to sit. Since it's in that bun, the hair on the top of my head makes a solid foundation for the combs to be in. With the front ends pushed closer, all I had to do was put the hat over the top of the combs and make sure that they were tucked in. Friction holds it in place! My husband took me to lunch, and with the wandering we did before and after, it's stayed firmly on my head with no slipping.

Summary:
1. Contour box to hug the shape of your head.
2. Cover box with felt.
3. Cover box with desired fabric.
4. Line inside of box.
5. Embellish.
6. Secure to your head.
7. Prepare for compliments.

BONUS HAT!

Since I had it, I used one of my smaller candy boxes to make a fascinator/headband inspired by one I saw online.


The small box is hot glued to a wide brown satin headband.


The satin ribbon covers the Russell Stover logo on the lid. But take off the lid and you will find...


Inside the box are three felt candies, glued into the paper cups. The plastic divider is glued into the bottom of the box (it melted, but that was ok), and then the candies were glued into that. The bottom of the box is covered with red felt (hiding all that silly nutritional information. I also used a red Sharpie on the edges of the box to unify the color.

It's silly and fun, and the chocolates are fairly realistic looking. Hubby actually reached out to take one (in his defense, the light was dim where I showed it to him).

So there you have it, two hats for February! Happy Valentine's Day!