 |
| Here's Matilda modeling the poncho, and Agatha modeling the beret. So nice to see the girls cooperating. |
What can I say, it's a gift.
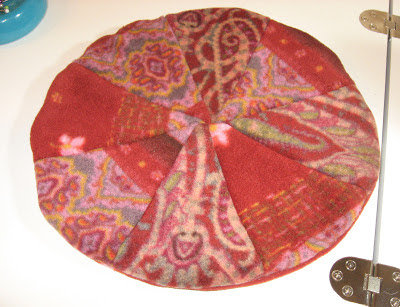
I decided that I needed a beret to go with my poncho. There was a large enough piece of the border material to make a circle, but then my beret would have had stripes, and that wasn't the look I wanted. So, I folded the pattern piece into quarters, scanned and printed it out. I wasn't sure I could do what I wanted, so I printed out three more so I could place the pattern pieces on the material -- and learned I didn't have enough material to do it that way. Folding the piece into eighths made it possible to use the largest amount of the bordered material, and use only two wedges that used very little of it.
 |
| I added a half-inch seam allowance to my pattern wedges. Also, printing on "draft" uses a whole lot less ink. |
 |
| Wedges cut out and arranged before pinning. |
 |
| I can stick my finger through the hole in the center. Easily fixed. |
On Saturday, I made this:
The pattern came from Fleece Fun, and is super-easy. Unfortunately, I learned that I have good reason to hate and fear buttonholes. Because I suck at them. I ended up sewing a tight zigzag instead, and it worked pretty well.
I'm happy with how the hat turned out, but I think I should have gone with a medium instead of small, as it's a bit snug (even with the ribbon untied). For reference, my head measures 22". Unfortunately, as cute as it is, I don't think I like the style on me. It's basically a cloche, and not my preference. I hemmed the edge with a zigzag stitch, but I think it would be really cute if it was hemmed with a short straight stitch, stretching as you sew, making a lettuce edge.
Anywho, if you haven't yet visited Fleece Fun, go. She has so much there -- for free! -- that you're crazy not to check it out. Her satin hair flowers are going to end up on my thrift store hat redo, as soon as I get some more satin.
UPDATE:
I lined the beret and it looks much better. I was concerned that it might change the way the hat lies on my head, but it doesn't appear to have done so.I also ripped out the zigzag hem of the leopard hat, and restitched it with a straight stitch, pulling the fabric as I went to ruffle it slightly. It's cute. :)
 |
| From the Basic Hat with Ribbon pattern available at FleeceFun.com |


4 comments:
Hello! I'm just making the little hat and just tried the crinkly edge but it hasn't worked. Do you sew closer to the edge to get the effect or near the cut edge as you would if doing the zigzag stitches?
I'd be very grateful for your advice..... :)
Can you get the material to stretch, putting it between your hands as you sew it? If you can't get it to stretch, I don't think you can get a ruffled edge.
I was pulling it tight and easing it under the presser foot more than allowing the feed dog to take it. I was sewing close to the edge, but I didn't trim it because there's a tiny hem there from turning under the raw edge.
(I'm not a very experienced seamstress, I hope that makes sense!)
Thank you so much! I'll try that. :)
AuntSue
Fleece is ususally stretchier in one direction than the other. When you are cutting it out, make sure the edge of the hat is in the stretchier direction if you want a lettuce edge.
Post a Comment