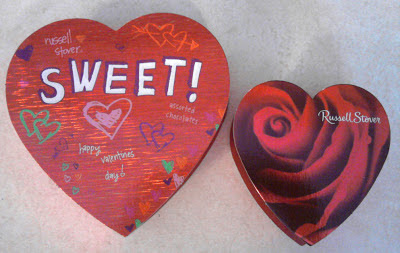
I bought a couple of heart-shaped candy boxes, with the idea of turning one of them into a velvet Conversation Heart pillbox hat. I never did find any pink velvet... Anyway, the Russell Stover boxes I got were not quite the right size. The little 3-piece box (right) was too small, and the larger box (don't remember how many pieces, but it was the next size up -- 7, maybe?) was too large. Bummer.
 |
| The larger heart is 5.5" in the longest dimension, the smaller is 4"; both are 1" deep. The gift box (not pictured) is 4.5" and about 1.5" deep. |
I used pink velour to sew a cover for the box, basically making a fabric version I hoped to slip over it that would fix snugly, but when I tried it, it did not work as I'd hoped. I hot glued pink felt on the sides to cover the printed design, and to give a softer surface for the velour to cover, particularly the bottom edge of the sides that were a little uneven from my surgery of them. My second attempt was to stretch the velour over the box and glue it on the inside. I started from the front (the most visible part) and worked my way around. I did end up with two pleats at the back that I might have been able to dart to make fit better, but I was afraid to cut into the fabric at that point because I didn't have any to spare.
 |
| Contoured back and sewn up pleats. |
 |
| Contoured front. |
After I got the velour glued in place, I lined the inside of the box with more felt to cover the folded-over sides, and crown. I did sew the edge of the felt down; that helped me snug the velour down a little more. Once the edge was sewn, I did glue the sides. I also sewed the pleats at the back, to try and flatten them more.
I used a glossy fabric paint writer (Scribbles®) to spell out "BE MINE" on the top, after marking the letters with a tailor's pencil. Unfortunately, I still haven't gotten all the marks off from that. The lettering isn't perfect, but considering my handwriting, it's pretty fabulous.
How I'm getting it to stay on my head is a little strange, but I'll try to describe it. I bought this nifty double hair comb thingie at Target. Because of the shape of the heart, it's too wide without fussing with it a bit. I have to push the front edges closer together to allow them to be completely covered by the hat.
I wound my hair into a pretty tight bun, secured with hair sticks, then put the combs in where I wanted the hat to sit. Since it's in that bun, the hair on the top of my head makes a solid foundation for the combs to be in. With the front ends pushed closer, all I had to do was put the hat over the top of the combs and make sure that they were tucked in. Friction holds it in place! My husband took me to lunch, and with the wandering we did before and after, it's stayed firmly on my head with no slipping.
Summary:
1. Contour box to hug the shape of your head.
2. Cover box with felt.
3. Cover box with desired fabric.
4. Line inside of box.
5. Embellish.
6. Secure to your head.
7. Prepare for compliments.
BONUS HAT!
Since I had it, I used one of my smaller candy boxes to make a fascinator/headband inspired by one I saw online.
The small box is hot glued to a wide brown satin headband.
The satin ribbon covers the Russell Stover logo on the lid. But take off the lid and you will find...
Inside the box are three felt candies, glued into the paper cups. The plastic divider is glued into the bottom of the box (it melted, but that was ok), and then the candies were glued into that. The bottom of the box is covered with red felt (hiding all that silly nutritional information. I also used a red Sharpie on the edges of the box to unify the color.
It's silly and fun, and the chocolates are fairly realistic looking. Hubby actually reached out to take one (in his defense, the light was dim where I showed it to him).
So there you have it, two hats for February! Happy Valentine's Day!


No comments:
Post a Comment