Showing posts with label interior decoration. Show all posts

Friday, August 31, 2012

Reclaiming the Basement

Two years ago, we moved into this house. Things we didn't know where they were going to go or what was in the box ended up in the basement. I've chipped away at it periodically, unpacking a little here and there, but it's driving me crazy. There's space down there that's supposed to be for dancing (it used to be workout space, complete with mirrored wall, stereo and rubber-matted floor; previous owners had a home gym). Since it's full of stuff, I can't dance, which makes me sad.

I've got art supplies, craft supplies, miscellaneous sewing supplies, fabric, etc. strewn all over. I can't find things I know I have, and that also makes me sad. Part of the reason I have so many UFOs is because I can't find the things I want/need to finish them. (The other part is because I have the attention span of a caffeinated hummingbird.)

This weekend is WorldCon/ChiCon 7, and my husband (whose office is in the basement) is going. Since he won't be home, I won't feel guilty about making noise and playing music he doesn't care for, distracting him from whatever he's working on. (He's a mad scientist, who knows what-all he does in there...) So given this opportunity, I'm going to work some more on getting that space organized. Which will mean making a bigger mess as I sort. I may run over to the dollar store and get some cheap containers to sort things into, that way if I can't finish, at least the piles are contained and sorted instead of heaps on the floor.

Once the mess is contained, I can work on (not this weekend, LOL) getting the newly emptied and clean space decorated. I have Pinterest boards for the dance side and the lounge side. And I really want to get started... It's really the last space in the house that needs to be finished, and it's kind of important to me that I have a place to dance again, since I my classes are too far to reasonably drive for an hour-long class. I'll also be able to do yoga and tai chi in that space, once it's cleared out. Health, exercise and sanity are all hinging on me getting that done! Perhaps a small exaggeration, but only a small one...

SO... with the idea of stating my intention to the universe (and by "universe" I mean "internet") as catalyst for actually accomplishing something, here's the current "before" pictures...

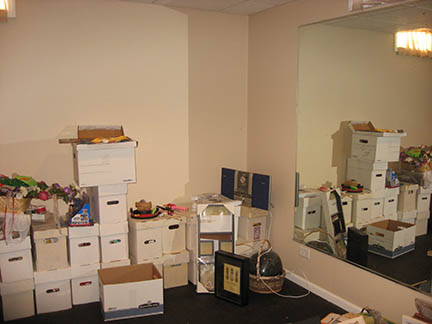
Mirror wall on the left, lounge area on the right, mess everywhere...

Sewing area left, drafting table (for various projects) center, more mess...

The black floor (what you can see of it) is the rubber floor matting), the goal is to clear it all.

Boxes of toys that need to be dealt with.

The wall visible on the left will be lined with bookcases, and my action figures will move to there.
They don't fit my dance theme, but they belong more on the "feminine" of the basement. I'll make it work...

Drafting table, and one of the natural light sources from a window well. (Need a sheer to cover the "view.")

Sewing area. Believe it or not, I have been using the machine like that, for small felt food stuffies
for my daughter. Imagine what I could accomplish if it were cleaned up!

The mostly-done lounge. The wall on the left of the photo (which is also the mirror wall)
will be painted red. All those DVDs will be moved to...

...where the action figures are now.

See? I'm trying to keep it all organized!

I really am! It will be easier (I hope) when I have everything sorted so I can find it all.

So there ya go, my in-progress basement as it looks this morning (Friday, August 31, 2012). I will update on Monday with what I got done. I'm kind of hoping to be able to show a ton of progress, but when I worked on it a few weeks ago, it hardly looked like I made a dent, even though several boxes of children's books made it up to the new children's library/guest room.

Sunday, June 17, 2012

Closet Redo: The Home Stretch

I'm a bad wife -- I put my husband to work on Father's Day. (I made it up to him with the dinner he requested.) Saturday we built the tower. It's made with sanded plywood, MDF and wood veneer tape. I ran into some slight issues when I trimmed the veneer tape. In cutting off the excess, I bit into the wood in a few places -- oops! So I sanded those places smooth, and I'm calling this "technique" unintentional antiquing. Instead of a new-looking piece of furniture, this one has dings on the edges, just like if it was an older piece! Woo! (Lemons to lemonade, people... besides, it's in the closet, not the front hall.) I stained it and let it dry overnight, and this morning we moved it upstairs.
 
I scrubbed the scuffed paint in the back of the closet with a Magic Eraser. He suggested I might want to repaint the walls in there since everything was out, but I wasn't keen on that. The Magic Eraser worked as advertized and the scuffs and smudges are gone, and I didn't have to paint (huzzah!).

Blank slate, before I cleaned the walls.
I removed the strip of baseboard so the tower fits more snugly into the space and flush to the wall. We got it in the closet, put up the cleat to support the shelf, and went to put up the closet rod... and discovered that I miscalculated. The rods I got are too long. *sigh* He had to cut them down so I can still use them, because I'd really rather have metal than wooden rods. Since I already miscalculated once, we got the first rod up, hung stuff on it, measured measured measure, then hung the second rod. Once this closet is finished, I can look at the other one, and see about redesigning it, as well.


Baseboard removed
The edge of plywood isn't pretty, but veneer tape fixes that! Looking just at the edges, there's no difference
between the the plywood and the MDF shelves, because it's all got the veneer on it.
 I am just stupid-excited about this. I am not a girlie-girl. I don't have a massive shoe and purse collection. But for some reason, this project is just firing up both those Xs, and making me want to Squeee! with girlie anticipation. Maybe it will inspire me to embrace style and femininity in a way I haven't before. (But I'm not holding my breath...)

For the organization part, I put my hat boxes to the top shelf, which is high enough for me to need a step stool to reach. Since I don't wear my hats that often, not a big deal. I had a couple of baskets already, just the right size, that I used for socks, which are now mostly in laundry baskets because my sock drawer is full. (I have tons of socks!) I bought clear plastic shoe boxes to keep what shoes I do have dust free.

Both baskets contain socks. The shelf above the basket is purses
and hair things. The very top shelf is mainly hats.
Shoes!
Years ago, I made the handiest thing ever for organizing my barrettes, but it's too long and the material has yellowed, so I made new ones.

Just a strip of corduroy with a large split ring at the top --
the texture of the material grips the barrettes and holds them in place!


I used robe hooks to hang the new barrette strips. They fit neatly there in an otherwise unusable space; that wall they're on is only about 8 inches wide.

There's one more space in this closet that I'm customizing...


I'm going to add shelves to that awkward space below the barrettes and the jewelry board. Those shelves will hold my Orphanware™ pieces, and organize more jewelry. The space will be stylishly designed to both hold and display the pieces, making them an attractive feature that's more than just utilitarian.

So there it is! My nearly-completed closet redo! I'm so pleased with how it turned out, and plan to put even more thought into the other closet, and measure more meticulously. This was an excellent learning exercise.


UPDATE: Here's the rest of what I did with the closet.


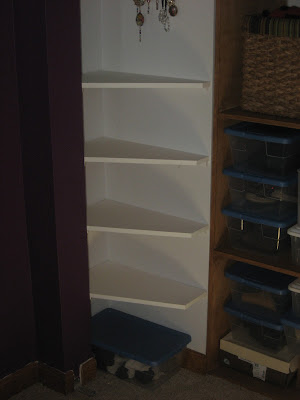
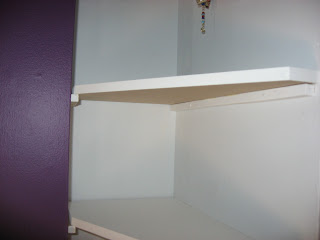
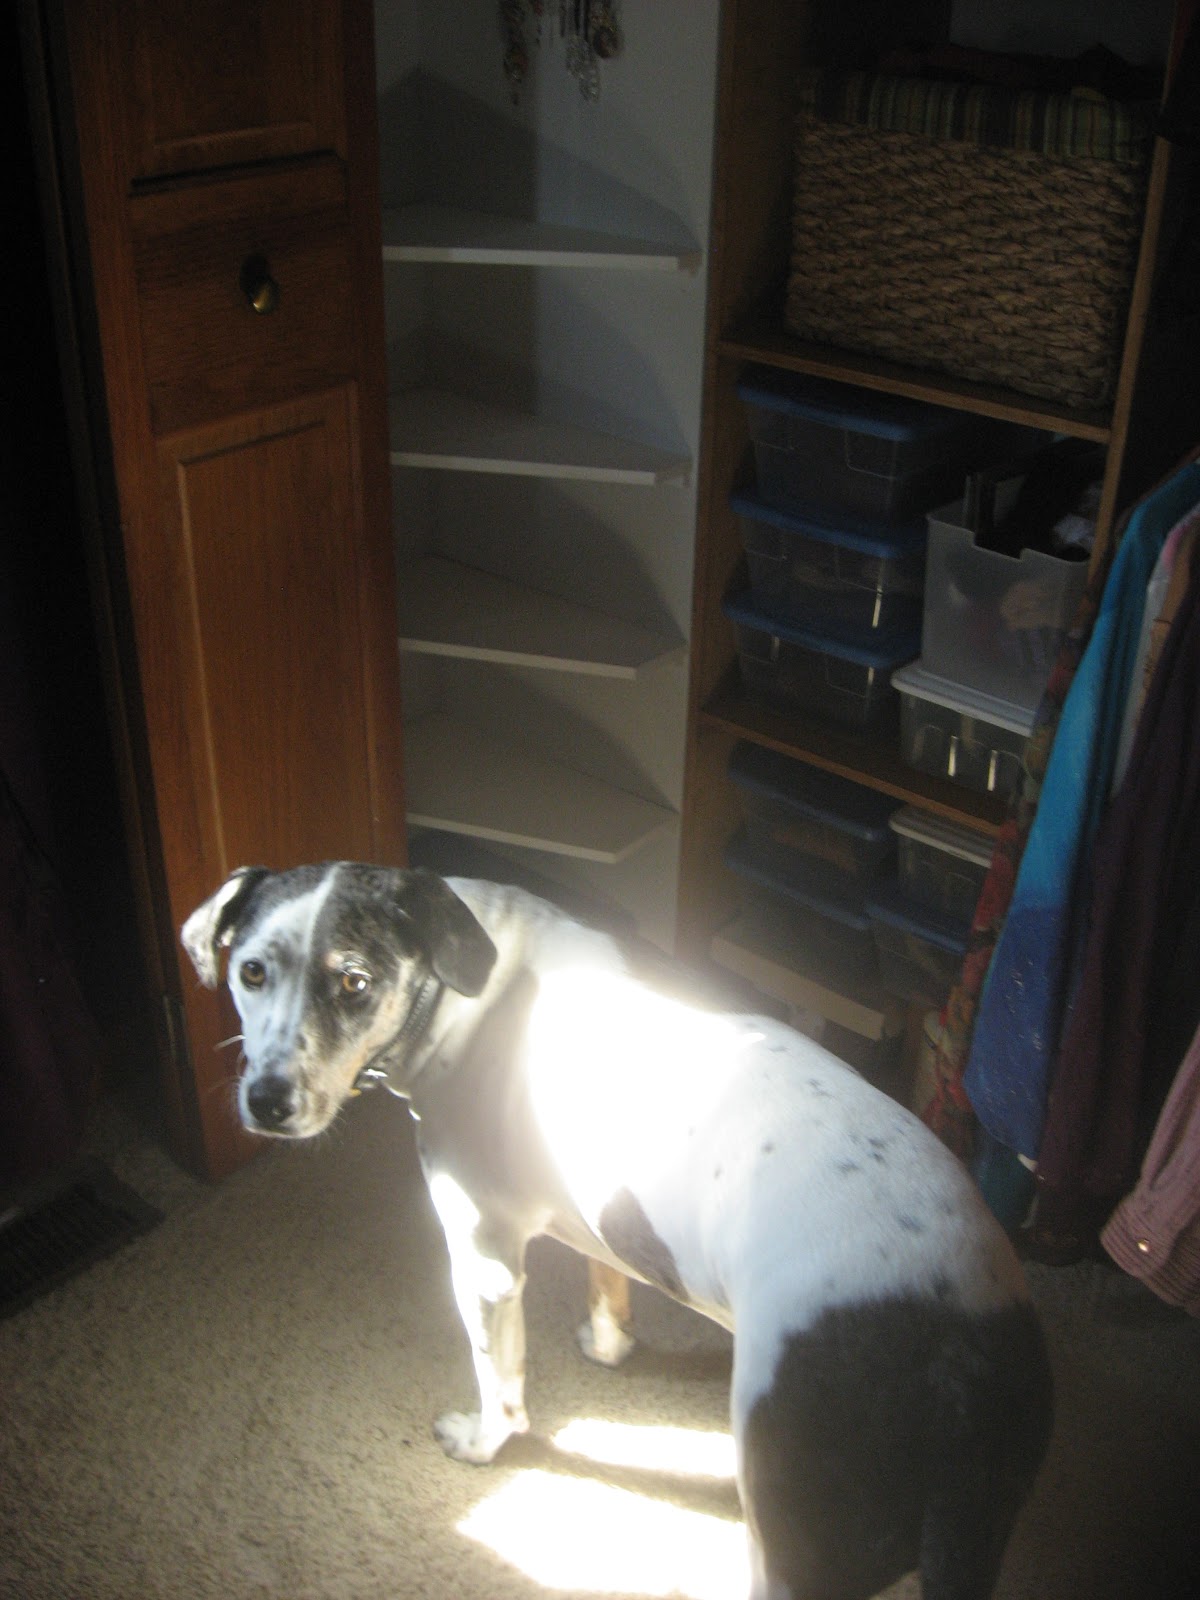
The shelves are supported by (and glued to) small cleats nailed to the drywall. Each shelf is a little narrower at the pointed end, so that the shelves sort of "fan out" as they go down the wall. I did this because I wanted the bottom shelves to be a little more visible and not be completely obscured by the shelves above. They're white so the focus is on the Orphanware™ and jewelry, not the shelves. It's a dark corner, having shelves anything but white would have been really dark and distracting. Penelope was my able assistant while I worked on this. I am insanely pleased with how it all turned out.

Wednesday, March 7, 2012

Inexpensive Library Table

When we bought our house, we were excited about the formal living room. Not because we're formal people, but because the space was perfect for a home library. We're both bibliophiles, and have a ton of bookcases. We bought more...

Because the room was sizable, we decided to make a library table using six short bookcases (two rows of three set back-to-back) with a furniture-grade plywood top, and trimmed out to look like a single, sizable, piece of furniture. The whole thing sits on a rug that protects the hardwood floor and breaks up all the woodgrain, floor to (laminate) bookcases. We bought the bookcases (furniture-in-a-box; I think the manufacturer is Sauder) on sale at Meijer as part of their back to school sale, so if you're thinking of trying this, that's a good time to buy them. 

The top of the table is made from a sheet of plywood, cut to size and stacked. A single layer didn't give us the height we needed to add trim and have the trim be high enough to get books off the top shelf.
We used that grippy shelf/drawer liner stuff to keep the plywood from sliding on the tops of the bookcases. I used green wood stain on the plywood, a color close to one of the shades of green in the rug. (The room also has one green wall.)


Two coats of Minwax Express Color in Emerald, much prettier in person.
Once the top was finished, the trim was stained. I used Minwax PolyShades hoping to do it all in one shot -- don't be lazy; I hate that crap and won't ever use it again. Use stain, then seal it with polyurethane. PolyShades is nearly impossible to apply evenly. ANYway, we found trim that had a leaf motif, an excellent complement to both the green colors in the room, and the leaves in the rug. The trim was mitred to fit perfectly onto the table surface, and nailed into the plywood. (If we had to, the table surface can be lifted off of the bookcases, but it would take several people to do it -- it's heavy!)

First coat of poly/stain. We found the trim at Home Depot.
The finished table, exactly the right height for looking something up in the big unabridged dictionary, is my pride and joy. It's the first thing I see when I come downstairs in the morning, and it still gives me a bit of a rush.


Completed table, with the trim stained to closely match the color of the laminate bookcases.
I call it an "inexpensive library table" only in comparison to something that was made in a single piece and out of wood instead of particle board. I honestly don't remember exactly what we paid for each one, but it was probably around $20 each on sale (this was two years ago), so "inexpensive" is highly relative. If you're thinking of picking them up one at a time, as finances allow, remember that availability may change, styles may be discontinued, etc. 


Also, if you're a serious bibliophile and need to keep track of your collection, I highly recommend LibraryThing, an online book cataloging website. It's fantastic!

Friday, December 9, 2011

A Million Ways to Procrastinate

I signed up at Pinterest in June as part of 30 Days of Creativity, but didn't really do much with it after the month was done. A friend of mine started using it, which made me take a second look at the site. And I have been using it to daydream about new projects ever since...

Ever since I got over my initial horror of destroying books, working on my own altered book, I've been looking at them with new eyes. So many books are discarded! I would never destroy something valuable (collectible, rare, etc.), but there's an awful lot of books that don't fall into that category. If you just look at the people who've tagged recycled books on Pinterest, there's tons of amazing, creative and fun projects. There's Christmas ornaments in particular I am dying to make. Currently, my vintage aluminum tree is set up in the library... but wouldn't it be awesome to have a book-themed tree?

We're working on finishing up our unpacking and organizing (we moved in last July) in the basement, where a lot of boxes ended up, yet to be unpacked. I know how I want to decorate that space, and Pinterest is giving me a lot of inspiration there, too.

Whatever you can think of, there's probably someone at Pinterest who's thought of it, too. And you will find a million ways to procrastinate.