I scrubbed the scuffed paint in the back of the closet with a Magic Eraser. He suggested I might want to repaint the walls in there since everything was out, but I wasn't keen on that. The Magic Eraser worked as advertized and the scuffs and smudges are gone, and I didn't have to paint (huzzah!).
 |
| Blank slate, before I cleaned the walls. |
 |
| Baseboard removed |
 |
| The edge of plywood isn't pretty, but veneer tape fixes that! Looking just at the edges, there's no difference between the the plywood and the MDF shelves, because it's all got the veneer on it. |
For the organization part, I put my hat boxes to the top shelf, which is high enough for me to need a step stool to reach. Since I don't wear my hats that often, not a big deal. I had a couple of baskets already, just the right size, that I used for socks, which are now mostly in laundry baskets because my sock drawer is full. (I have tons of socks!) I bought clear plastic shoe boxes to keep what shoes I do have dust free.
 |
| Both baskets contain socks. The shelf above the basket is purses and hair things. The very top shelf is mainly hats. |
 |
| Shoes! |
 |
| Just a strip of corduroy with a large split ring at the top -- the texture of the material grips the barrettes and holds them in place! |
I used robe hooks to hang the new barrette strips. They fit neatly there in an otherwise unusable space; that wall they're on is only about 8 inches wide.
There's one more space in this closet that I'm customizing...
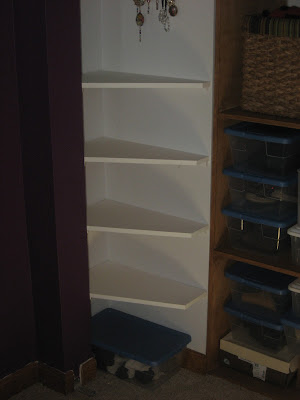
I'm going to add shelves to that awkward space below the barrettes and the jewelry board. Those shelves will hold my Orphanware™ pieces, and organize more jewelry. The space will be stylishly designed to both hold and display the pieces, making them an attractive feature that's more than just utilitarian.
So there it is! My nearly-completed closet redo! I'm so pleased with how it turned out, and plan to put even more thought into the other closet, and measure more meticulously. This was an excellent learning exercise.
UPDATE: Here's the rest of what I did with the closet.


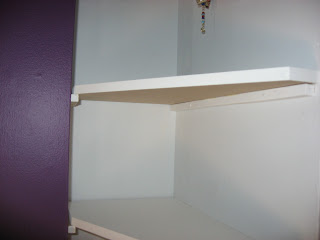
The shelves are supported by (and glued to) small cleats nailed to the drywall. Each shelf is a little narrower at the pointed end, so that the shelves sort of "fan out" as they go down the wall. I did this because I wanted the bottom shelves to be a little more visible and not be completely obscured by the shelves above. They're white so the focus is on the Orphanware™ and jewelry, not the shelves. It's a dark corner, having shelves anything but white would have been really dark and distracting. Penelope was my able assistant while I worked on this. I am insanely pleased with how it all turned out.


3 comments:
I am so impressed!! After you get done with yours, maybe we could work on mine?
Daddy says it looks great!
(Thanks, Dad!) Since you share the space, I'm not sure you could do what I did. You could maybe do a narrow tower in the center and do 3 rods, 1 at the top, then 2 on the other side for short things. When I'm down next, we'll look at it. :)
Post a Comment