There is a single pattern piece, it's sized by adding panels to the trumpet skirt, and has an elastic waistband. The directions call for serging the seams, leaving them exposed, with the option of sewing them to the inside. I don't have a serger, and I don't care for the look of all those exposed seams, so I sewed them to the inside. Honestly, it took way more time to pin all those panels than it did to sew them together.
The hem is curved and I quickly discarded a rolled hem as being a huge pain in the butt. I ended up using bias tape to do an enclosed hem instead. The coordinating quarter inch tape stiffened the hem a little, making it tend to stand out a bit; it's an effect that looks quite nice. It was time consuming; my hem was nearly 6 yards around because of the number of panels I used. For all the pinning and seams that had to be sewn, I still got it done in a day.
It's a really cute skirt, hitting me just below the knee. The flared hem is flattering and the elastic waist comfortable. It moves nicely, swirling with my steps, and twirling in it flares it out without being immodest since it's straighter at the hips. The way its pieced lends itself to many different combinations of color and pattern. Make it all one fabric, or make every one different -- it's up to you and your own sense of design. I used 4 different patterned materials from a single design line from Camelot Fabrics, but this won't be the last time I make the Sashay Skirt. And because you custom size it by the number of panels, I can easily make a skirt for my daughter using that same single pattern piece, unlike with most patterns where you have to cut into a multiple-sized pattern pieces, making them useless to make another size.
NOTE: If you have a directional pattern on the material, you're going to need more fabric than the instructions call for unless you don't care if some of your panels are upside down. (One of my blue panels is -- oops!)
 |
| You can see here that the light blue panel on the left of the photo is upside down. |
 |
| Lots of nice flare at the bottom. |
 |
| Showing how the bias tape gave a little body to the hemline. |
 |
| The bottom of the beret is of a sparkly pink material that doesn't quite match the bias tape, but coordinates nicely with the pinks in the material. |
 |
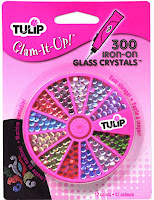
| These are not as sparkly as the Swarovski Elements iron-on crystals, but they're about half the cost. |


No comments:
Post a Comment